In 2018 it’s easier than ever to start your own blog. Regardless of how difficult and techy you think that it may be it really isn’t.
Although I will admit that there are a tonne of different options available that could leave you feeling quite confused and overwhelmed and basically stop you taking that leap into something that could eventually change your life.
Why should you start a blog?
Do you have a dream of being your own boss, leaving your job behind and being able to actually have free time to do what you want to do and have money appear in your account overnight from work you did months ago?
Blogging can make that possible!
Having a blog is a great tool that allows you to share your thoughts, knowledge and experiences with the world, but not only that it can turn into something that lets you earn an income with some of the most successful bloggers in the world earning six figure sums whilst travelling the world.
I have recently started to venture into making an income through blogging and you can follow my own progress via my income reports which I’m using not only to document my journey but to show others what is possible if you just commit yourself to it.
Some other bloggers are making six figures from their blog such as:
Michelle at Making Sense of Cents – Earned over $1,000,000 in a year!
If this sounds like the life that you want to live then this is exactly where you need to be right now and exactly what you should be doing to start your journey.
In this post I’m going to pretty much hold your hand and guide you through setting up your own blog using Bluehost and WordPress.
Why Choose Bluehost?
Bluehost are one of the most recommended hosting companies around and are actually recommended on the wordpress.org website as their top choices.
They also make it really simple to get started through their one-click wordpress install feature that makes setting up your blog even easier.
They’re also offering readers of this blog a special offer of $3.95 per month and that includes a domain name which would normally cost you an extra $20 on top of your hosting costs so this is an excellent deal.
What is self-hosted?
Let’s rewind for a second and go over what self-hosted actually means when it comes to blogging and setting up your blog.
There are free options to run wordpress blogs, through wordpress.com, but there are some limitations to running a free blog.
One of the main limits being the fact that you don’t actually own your blog. Now that’s a pretty big problem if you’re looking to start running your blog as a business. Not fully owning your assets leaves you at the mercy of wordpress.com and whether they feel you break any of their terms of service.
The second major issue with free platforms are their limitations in terms of features. You aren’t allowed to run adverts, optimise for search engines to help you rank better and you can’t make your blog look as nice as you would be able to with a self-hosted wordpress blog.
Self-hosting your blog means installing the wordpress platform on your own hosting provider meaning that you completely own your website and all the assets that you post on it. You will be able to customise it to your hearts content to get it looking exactly as you want it and you’ll be able to do so much more with it in terms of features and functionality.
That’s why I always recommend that people self-host right from the beginning as it saves a lot of hassle further down the line.
So let’s get started in actually setting your blog up through bluehost.
Bluehost WordPress Setup Walkthrough
First things first you’ll want to choose a domain name. This is basically the address for your website. My domain name for example is impeter.co.uk, so choose something that relates to you and your blog. It could be something as simple as your name.
Get started by clicking on the image below and hitting the “Get Started” button on that screen to begin the signing up process.

You can actually check if your desired domain is available below before you get started.
Next you’ll be greeted by the screen that lets you choose the type of hosting package that you want to take. We would recommend starting off on the basic package, but it really depends on your needs and how much you think your blog is going to grow over the years.
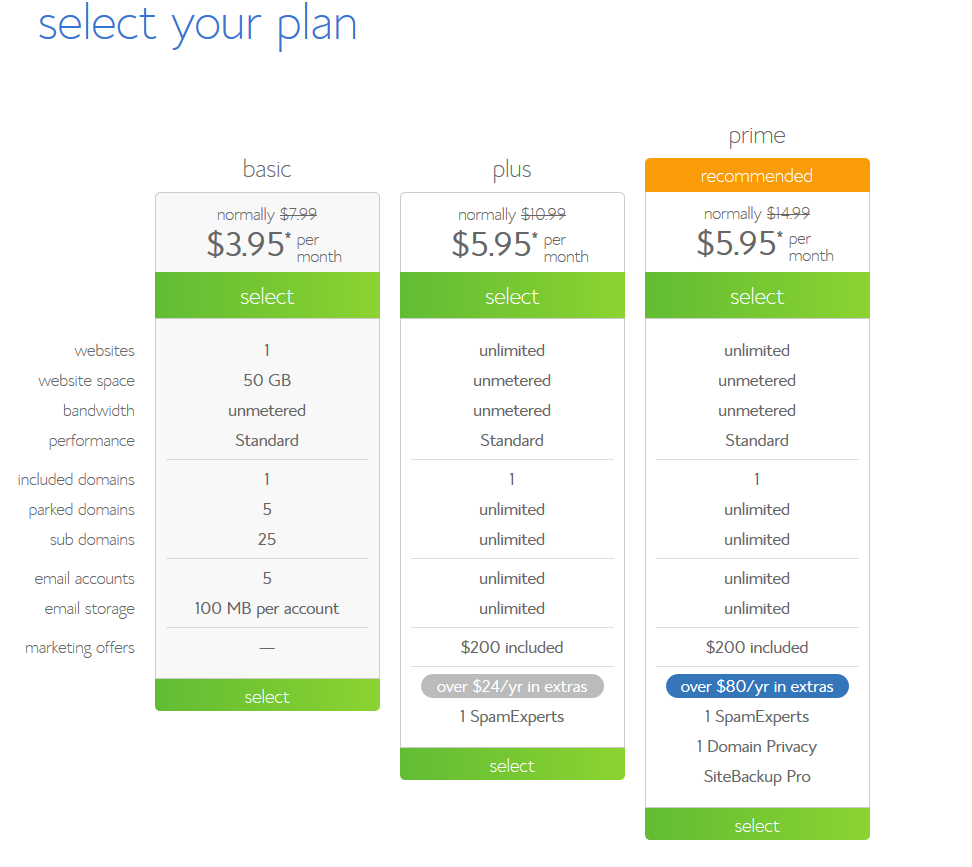
Over time your website will grow in size due to the photos that you upload, so whether you want to invest in advance for that or not is up to you.
Now that you’ve decided on the plan that suits you best it’s time to choose your domain name. You can do this using the boxes on the below screen.
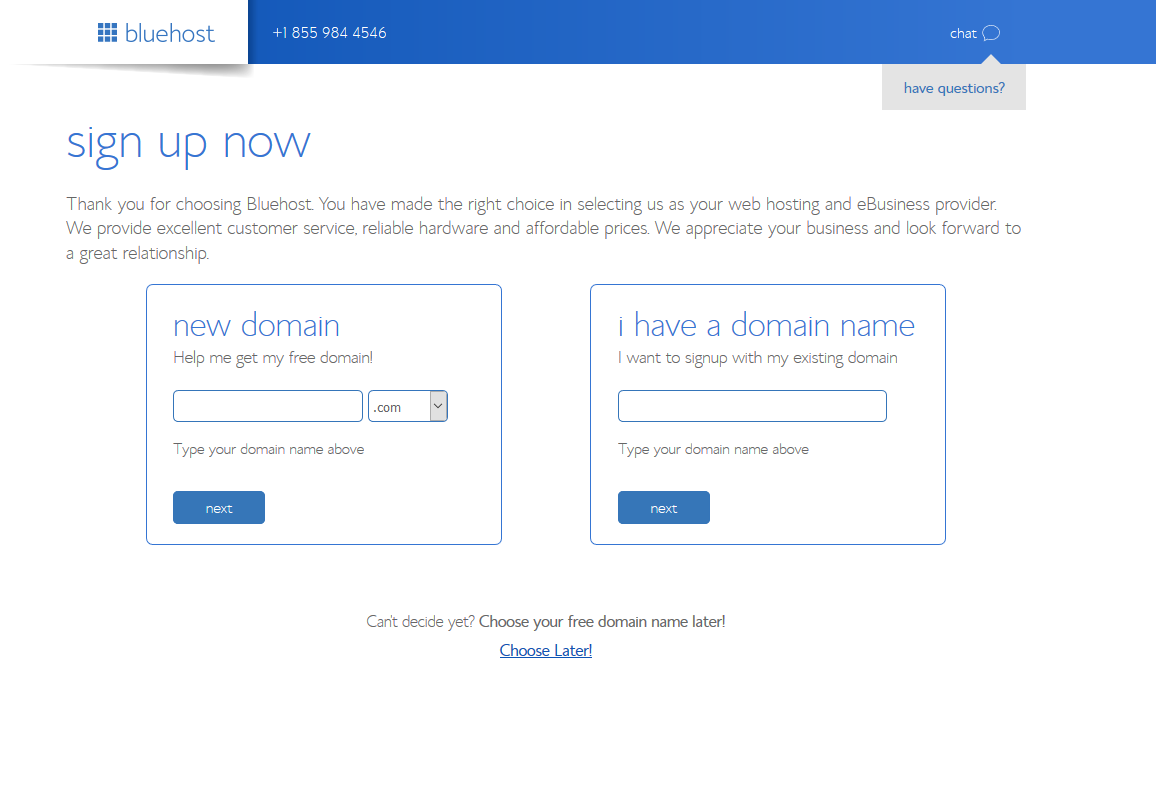
If you still haven’t chosen one yet then don’t worry you can continue the set up process without actually choosing your domain name at this time, just hit the text at the bottom of the screen to keep going.
Next you’ll be asked to fill in your details for the account, so pop in all the usual details like name, address, etc and then scroll down.
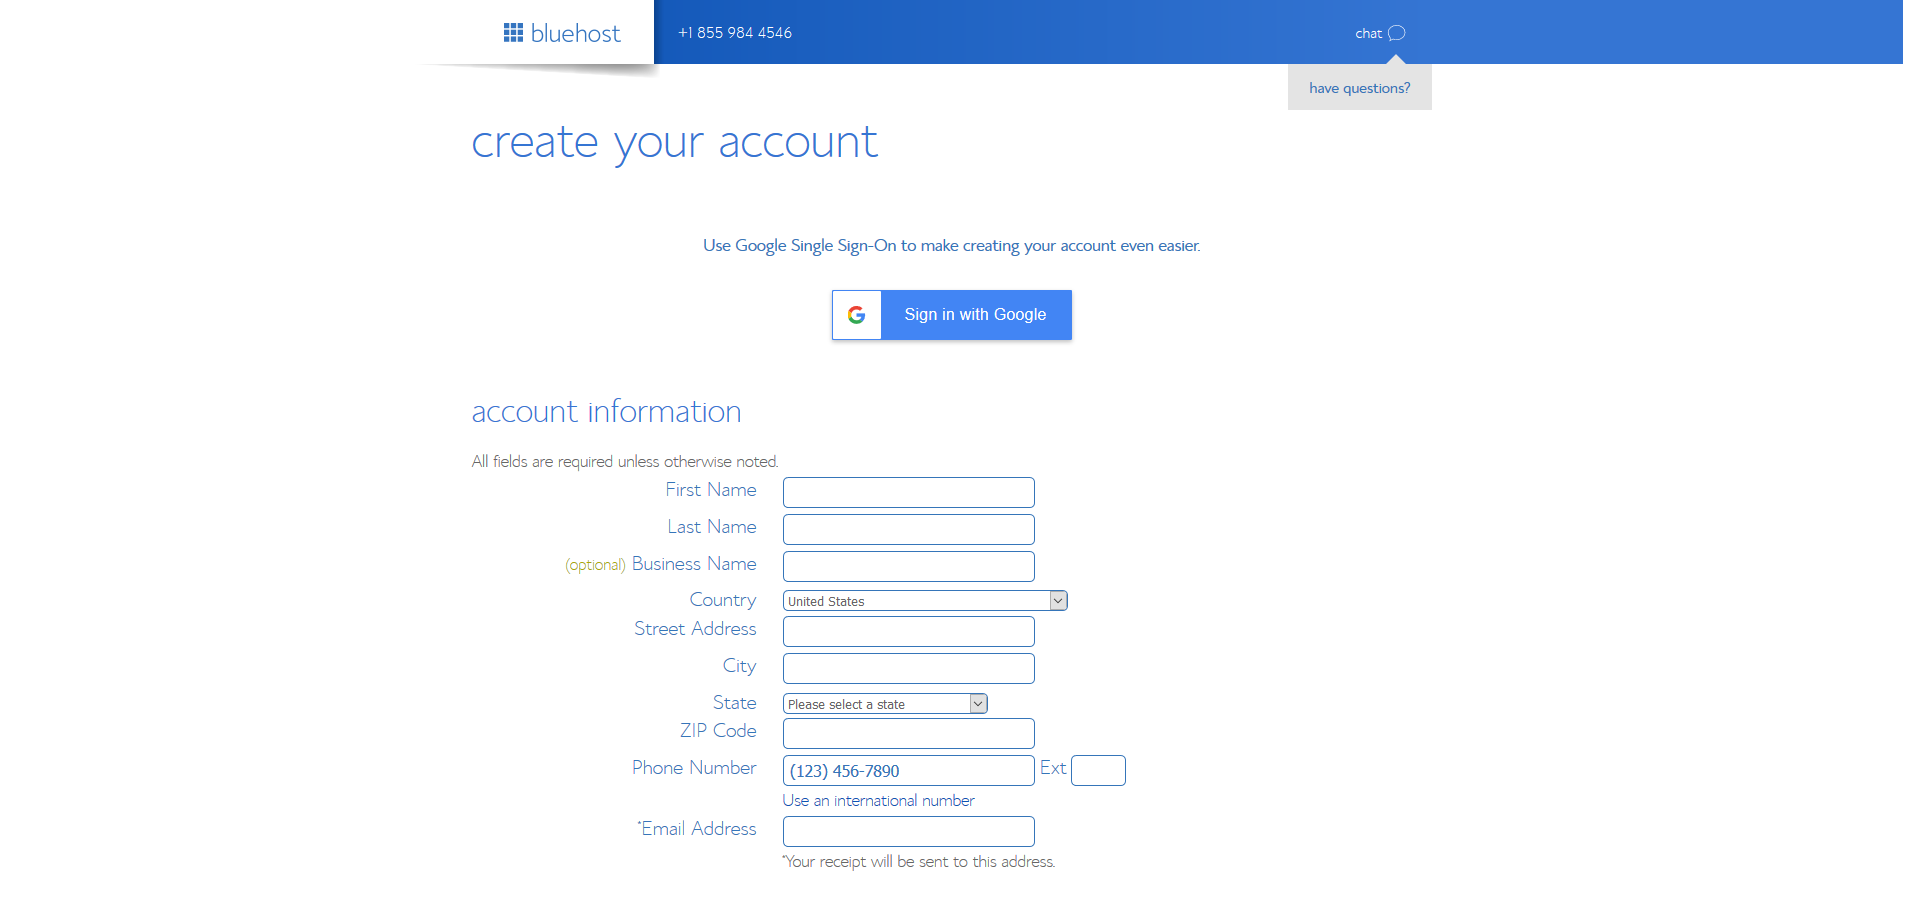
I would recommend unticking the box for SEO tools if it’s selected as you don’t really need those and you can do it all for free once your site is set up.
Also untick the sitelock and codeguard boxes as both of these can probably be done without the need for extra cost.
Once you’ve filled in all the details and popped in your payment information just agree to the terms and conditions and that’s it.
You now have your very own website!
Just a few more steps to do, but effectively you are now the owner of a website, how does that feel?
WordPress Installation
So you’ve got your hosting set up and now it’s time to install your wordpress blog. Thankfully bluehost has put together this handy video webinar to show you how to set up your blog and choose your theme.
Follow these steps and you’ll be up and running in no time.
Once you’ve set up your blog, I would love to hear from you with all the information about your site and what you’re planning to do with it.